Deliciously Gluten-Free Bread: Master the Art of Creating Gluten-Free Bread at Home
- Understanding Gluten and its Effects on Health
- Benefits of Gluten-Free Bread
- Essential Ingredients for Making Gluten-Free Bread
- Step-by-Step Instructions for Making Gluten-Free Bread
- Mixing the Dry Ingredients
- Preparing the Wet Ingredients
- Combining the Ingredients
- Kneading and Shaping the Dough
- Allowing the Dough to Rise
- Baking the Bread
- Tips and Tricks for Successful Gluten-Free Bread Making
- Variations and Additions to Gluten-Free Bread
- Storage and Shelf Life of Gluten-Free Bread
Gluten-free bread has become increasingly popular in recent years, catering to individuals with gluten sensitivities or those following a gluten-free diet. Unlike traditional bread, which is made with wheat flour containing gluten, gluten-free bread is made using alternative flours and ingredients that do not contain this protein. This allows people who are intolerant or allergic to gluten to still enjoy the deliciousness of freshly baked bread. In this article, we will explore the art of creating gluten-free bread at home, providing you with step-by-step instructions and helpful tips for successful baking. So let's dive in and discover the world of deliciously gluten-free bread!
Understanding Gluten and its Effects on Health
Gluten is a protein found in wheat, barley, and rye. For individuals with celiac disease or gluten sensitivity, consuming gluten can cause adverse health effects. Celiac disease is an autoimmune disorder where the ingestion of gluten damages the small intestine. Symptoms include digestive issues, fatigue, and nutrient deficiencies.
Even for those without celiac disease or gluten sensitivity, reducing gluten intake can have health benefits. Some studies suggest that a gluten-free diet may help improve digestion, reduce inflammation, and alleviate symptoms of certain autoimmune conditions.
By understanding the effects of gluten on health, individuals can make informed choices about their dietary preferences and explore the world of delicious gluten-free alternatives like bread.
Benefits of Gluten-Free Bread
Gluten-free bread offers numerous benefits for those with gluten sensitivities or celiac disease. Firstly, it allows individuals to enjoy the pleasure of bread without experiencing any adverse health effects. By eliminating gluten from their diet, they can alleviate symptoms such as bloating, abdominal pain, and fatigue.
Moreover, gluten-free bread is often made with alternative flours that are higher in fiber and nutrients compared to traditional wheat-based bread. These flours, such as almond flour or quinoa flour, can provide essential vitamins and minerals like magnesium, iron, and B vitamins.
Additionally, gluten-free bread can be a healthier option for weight management. It tends to have fewer calories and less fat than regular bread. This makes it an excellent choice for those looking to maintain a balanced diet or lose weight.
Furthermore, gluten-free bread opens up a world of culinary possibilities for individuals with dietary restrictions. With the availability of various alternative grains and ingredients, there are endless opportunities to experiment with unique flavors and textures in gluten-free baking.
In conclusion, the benefits of gluten-free bread extend beyond just catering to dietary restrictions. It provides a safe and delicious alternative for those with gluten sensitivities while offering nutritional value and versatility in the kitchen.
Essential Ingredients for Making Gluten-Free Bread
To create delicious gluten-free bread at home, it is important to have the right ingredients on hand. Here are the essential ingredients you will need:
1. Gluten-Free Flour Blend: This is the base of your bread and can be a combination of different flours such as rice flour, almond flour, tapioca flour, or potato starch. It is important to use a blend to achieve the right texture and flavor.
2. Xanthan Gum or Guar Gum: These binders help replace the elasticity that gluten provides in traditional bread. They improve the structure and prevent crumbling.
3. Yeast: This is what helps the bread rise and gives it a fluffy texture. Make sure to use gluten-free yeast to avoid any cross-contamination.
4. Salt: Adds flavor and helps control yeast fermentation.
5. Sweetener: A small amount of sugar or honey can be added to feed the yeast and enhance the taste.
6. Eggs or Egg Replacer: Eggs provide moisture, structure, and act as a binding agent in gluten-free bread. If you have an egg allergy or follow a vegan diet, use an egg replacer like applesauce or flaxseed meal mixed with water.
7. Liquid: Water or milk (dairy or non-dairy) adds moisture to the dough and helps activate the yeast.
8. Fat: Oil or butter adds richness and moisture to the bread. Choose a neutral-flavored oil like vegetable oil or use melted butter for added flavor.
By having these essential ingredients on hand, you'll be well-equipped to start creating your own delicious gluten-free bread at home!
Step-by-Step Instructions for Making Gluten-Free Bread
a. Start by mixing the dry ingredients in a large bowl. This typically includes gluten-free flour blend, xanthan gum, salt, and yeast.
b. In a separate bowl, prepare the wet ingredients such as warm water, olive oil, honey or sugar, and eggs.
c. Gradually pour the wet ingredients into the dry mixture while stirring continuously until well combined.
d. Once the dough starts to come together, transfer it onto a floured surface and knead it for about 5 minutes until smooth and elastic.
e. Shape the dough into a loaf or rolls according to your preference and place it in a greased bread pan or on a baking sheet lined with parchment paper.
f. Cover the dough with a clean kitchen towel and let it rise in a warm place for about an hour or until doubled in size.
g. Preheat your oven to the recommended temperature and bake the bread for approximately 30-40 minutes or until golden brown and hollow-sounding when tapped on the bottom.
h. Allow the bread to cool completely before slicing and serving. Enjoy your homemade gluten-free bread!
Mixing the Dry Ingredients
When it comes to making gluten-free bread, one of the first steps is mixing the dry ingredients. This is an essential part of the process as it helps to ensure that the bread has the right texture and flavor.
Start by gathering your dry ingredients, which typically include gluten-free flour blends, xanthan gum (a binding agent), salt, and yeast. Measure out the required amounts of each ingredient and place them in a large mixing bowl.
Using a whisk or fork, gently mix the dry ingredients together until they are well combined. This will help distribute the xanthan gum evenly throughout the flour blend and prevent any clumps from forming.
It's important to note that different gluten-free flours may have varying textures and absorbency levels. If you're using a homemade flour blend or a specific brand of gluten-free flour, be sure to follow their recommended measurements for best results.
Once your dry ingredients are thoroughly mixed, set them aside and move on to preparing the wet ingredients. Mixing the dry ingredients is just one step on your journey to creating delicious gluten-free bread at home.
Preparing the Wet Ingredients
Preparing the Wet Ingredients is an important step in creating delicious gluten-free bread. To begin, gather the necessary ingredients: warm water, olive oil, honey, and eggs. In a separate bowl, whisk the eggs until they are well beaten. Then, in a large mixing bowl, combine the warm water, olive oil, and honey. Mix these wet ingredients together until they are well incorporated. Finally, slowly add the beaten eggs to the mixture while continuously stirring. This will ensure that all of the wet ingredients are evenly combined and ready to be added to the dry ingredients in the next step of making gluten-free bread at home.
Combining the Ingredients
Once you have prepared the dry and wet ingredients separately, it is time to bring them together to create your gluten-free bread dough. Start by pouring the wet ingredients into the bowl of dry ingredients. Use a wooden spoon or spatula to mix them together until a thick and sticky dough forms.
Make sure all the ingredients are well incorporated, leaving no pockets of dry flour. The mixture should be smooth and evenly combined. If the dough seems too dry, you can add a little more liquid, such as water or milk, a tablespoon at a time.
It is important not to overmix the dough as this can result in a dense and gummy texture. Mix just until everything is blended together.
Once your dough is properly mixed, it is ready for the next step: kneading and shaping.
Kneading and Shaping the Dough
Once the gluten-free dough has risen, it is time to knead and shape it. Unlike traditional bread dough, gluten-free dough is typically more sticky and delicate. To prevent sticking, lightly flour your hands and work surface with gluten-free flour or a combination of rice flour and tapioca starch.
Gently punch down the dough to release any air bubbles. Then, transfer it onto the floured surface. Using your hands, fold the edges of the dough towards the center, rotating it as you go. Continue this process for about 5-10 minutes until the dough becomes smooth and elastic.
To shape the bread, you can either use a loaf pan or form a free-standing loaf. For a loaf pan, grease it with oil or line it with parchment paper before placing the shaped dough inside. If you prefer a free-standing loaf, shape the dough into a round or oval shape and place it on a baking sheet lined with parchment paper.
Remember that gluten-free bread does not rise as much as regular bread due to the absence of gluten. Therefore, shape your loaf slightly larger than desired to compensate for this.
Once shaped, cover the dough with a clean kitchen towel or plastic wrap and let it rest for another 30-45 minutes. This allows for further rising and development of flavor.
After this final rise, your gluten-free bread is ready to be baked!
Allowing the Dough to Rise
Allowing the dough to rise is an important step in making gluten-free bread. Since gluten-free bread lacks the elasticity of traditional bread, it requires a longer rising time to develop its structure and texture. After kneading and shaping the dough, place it in a greased bowl and cover it with a clean kitchen towel or plastic wrap. Let the dough rise in a warm, draft-free area for about 1-2 hours, or until it has doubled in size. This slow rise will help the bread achieve a light and airy consistency. Patience is key during this step, as rushing the rising process may result in a dense and heavy loaf of bread.
Baking the Bread
Once the dough has risen, it's time to bake your gluten-free bread to perfection. Preheat your oven to the recommended temperature, usually around 375°F (190°C). Place the dough in a greased loaf pan or shape it into a free-form loaf on a baking sheet.
Bake the bread for about 30-40 minutes, or until it turns golden brown and sounds hollow when tapped. To ensure even baking, rotate the pan halfway through cooking.
Once baked, remove the bread from the oven and let it cool in the pan for a few minutes before transferring it to a wire rack to cool completely. This will help prevent any sogginess.
Resist the temptation to slice into your freshly baked bread right away! Allow it to cool completely before slicing. This will give it time to set and develop its desired texture.
Now you can enjoy your homemade gluten-free bread! It's perfect for sandwiches, toast, or simply slathered with butter. Experiment with different toppings and spreads to enhance its flavor.
Remember that gluten-free bread may have a slightly different texture compared to traditional wheat-based bread. But with practice and experimentation, you'll be able to create delicious gluten-free loaves that rival their gluten-filled counterparts.
Tips and Tricks for Successful Gluten-Free Bread Making
1. Use a combination of gluten-free flours: Experiment with different combinations of flours like rice flour, tapioca flour, and almond flour to achieve the best texture and flavor in your bread.
2. Add xanthan gum or psyllium husk: These ingredients help bind the dough together and give it a more elastic texture similar to traditional bread. Start with small amounts and adjust according to your preference.
3. Let the dough rest: Gluten-free bread dough needs more time to rest and hydrate properly. Allow the dough to rest for at least 30 minutes before shaping or baking to improve its structure.
4. Use warm liquids: Warm liquids help activate the yeast and promote better rising in gluten-free bread. Make sure the liquid is not too hot as it can kill the yeast.
5. Add extra moisture: Gluten-free flours tend to absorb more moisture than regular flours, so add a little extra liquid to prevent dryness in your bread.
6. Avoid overmixing: Unlike traditional bread, gluten-free bread does not require extensive kneading. Mix until just combined to avoid developing excess air bubbles that can lead to a dense texture.
7. Invest in a good loaf pan: A sturdy loaf pan helps maintain the shape of your bread during baking, resulting in a well-formed loaf.
8. Test for doneness: Gluten-free bread may take longer to bake than regular bread due to its denser nature. Use a toothpick or thermometer to ensure it is fully cooked before removing from the oven.
9. Cool completely before slicing: Allow your gluten-free bread to cool completely on a wire rack before slicing. This will prevent it from crumbling or becoming gummy.
By following these tips and tricks, you can master the art of making delicious gluten-free bread at home that rivals its gluten-containing counterparts!
Variations and Additions to Gluten-Free Bread
One of the great things about gluten-free bread is that it can be easily customized to suit your taste preferences. There are numerous variations and additions you can experiment with to enhance the flavor and texture of your bread. Here are a few ideas to get you started:
1. Seeds: Adding seeds such as chia, flax, or sunflower seeds not only adds a delightful crunch but also boosts the nutritional value of your bread.
2. Herbs and Spices: Incorporating herbs like rosemary, thyme, or basil, or spices like cinnamon or nutmeg can infuse your bread with aromatic flavors.
3. Cheese: For a savory twist, try adding grated cheese such as cheddar or Parmesan to your dough. This will give your bread a rich and cheesy taste.
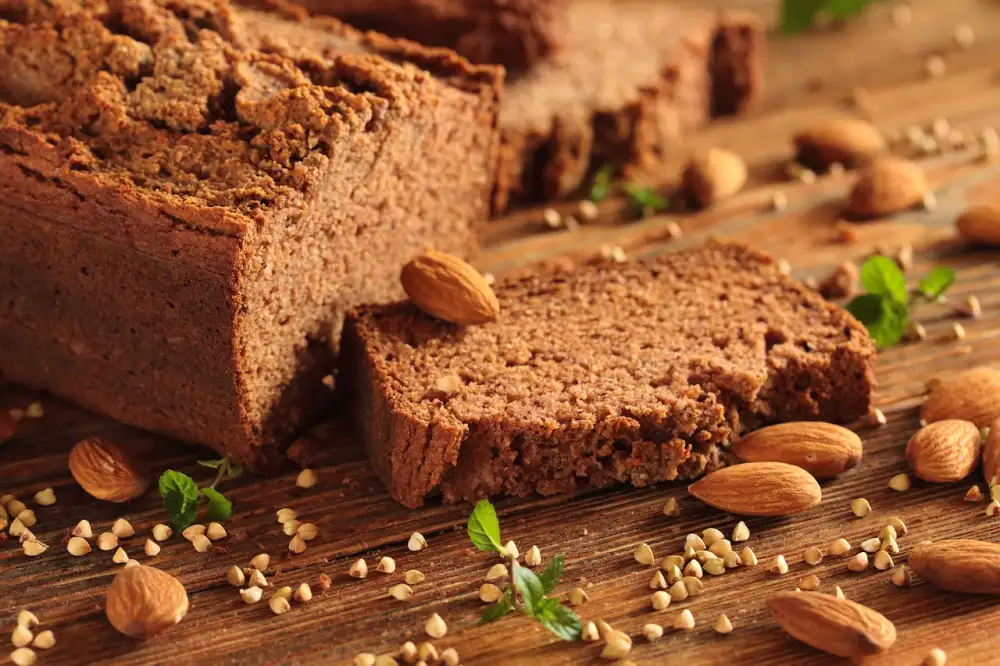
4. Nuts: Chopped nuts like almonds, walnuts, or pecans can provide an added crunch and nutty flavor to your gluten-free bread.
5. Fruits: Dried fruits like raisins, cranberries, or apricots can lend a touch of sweetness to your bread while adding bursts of flavor.
Remember to adjust the quantities accordingly when adding these variations so that they don't affect the overall texture and rise of the bread. Get creative and have fun experimenting with different combinations until you find your perfect blend!
By exploring these variations and additions, you'll be able to create unique and delicious gluten-free bread that suits your personal taste preferences. Enjoy the process of discovering new flavors while still maintaining the health benefits of gluten-free baking!
Storage and Shelf Life of Gluten-Free Bread
Proper storage is essential to maintain the freshness and quality of gluten-free bread. Once your homemade gluten-free bread has cooled completely, store it in an airtight container or resealable bag. This will help prevent moisture from getting in and keep the bread from becoming stale.
Gluten-free bread typically has a shorter shelf life compared to regular bread due to its lack of gluten. It is best consumed within 2-3 days after baking for optimal taste and texture. However, you can extend its shelf life by freezing it.
To freeze gluten-free bread, slice it into individual portions and wrap each slice tightly with plastic wrap or place them in freezer bags. Frozen gluten-free bread can last up to 3 months in the freezer without compromising its flavor.
When you're ready to enjoy your frozen gluten-free bread, simply thaw it at room temperature or toast it directly from frozen. Toasting helps revive the texture and adds a delightful crunch.
Remember that once thawed, gluten-free bread should be consumed within a few days as it tends to dry out quickly. Avoid refreezing previously frozen slices as this can affect the quality of the bread.
By following these storage guidelines, you can ensure that your homemade gluten-free bread stays fresh and delicious for longer periods, allowing you to savor its delectable flavors whenever you desire.
In conclusion, mastering the art of creating delicious gluten-free bread at home is not only possible but also incredibly rewarding. By understanding the effects of gluten on health and the benefits of a gluten-free lifestyle, you can take control of your diet and enjoy a wide variety of bread options. With the right ingredients, step-by-step instructions, and some helpful tips and tricks, you can create gluten-free bread that is just as tasty and satisfying as its traditional counterpart. So why not embrace the deliciousness of gluten-free bread and start exploring the world of gluten-free baking today? Your taste buds will thank you!
Published: 18. 11. 2023
Category: Food